After upgrading to Windows 11, some users experience a common issue – no Wi-Fi option after Windows 11 update. This issue bothered them a lot. After investigating extensive user reports and preferences, I find the Wi-Fi option disappeared can mainly be triggered by these reasons:
- The Wi-Fi driver is missing or corrupted.
- Hardware issues.
- Problems with the Windows OS.
Have you also encountered the Windows 11 no Wi-Fi option issue? How to fix the no Wi-Fi option Windows 11 issue? You don’t need to worry if you come across the same issue on your PC. Here, NewsPivot provides 6 effective solutions to help you solve this issue.
Let’s look at the troubleshooting advice now.
Method 1. Update Windows 11
Some people report that updating the old build of Windows 11 to the latest version helped them successfully fix the “Wi-Fi option disappeared” issue. You can also have a try. To do that, you just need to go to Settings > Windows Update and click Check for updates. If there are available updates, download and install them on your computer.
Method 2. Enable Wi-Fi Adapter
If the Wi-Fi adapter on your PC is disabled, you can also encounter the “Windows 11 Wi-Fi not showing up” or “Windows 11 no Wi-Fi option only Ethernet” issue. In this situation, you can try enabling it to fix the issue. Here’s the way:
Step 1. Press the Win + S keys to open the Search window, type “control panel” and press Enter.
Step 2. Set View by as Large icons, and then click Network and Sharing Center.
Step 3. Click Change adapter settings from the left pane.
Step 4. If the Wi-Fi adapter is grey, it is disabled. In this situation, you just need to right-click it and choose Enable.
Method 3. Run Network Connection Troubleshooter
Network connection troubleshooter is a built-in troubleshooter on Windows that can help you solve some basic problems related to the network. Thus, you can try to run this troubleshooter to fix the issue – no option to connect to Wi-Fi Windows 11. Here’s the guide:
- Press the Win + I keys to open the Settings window.
- Scroll down to select Troubleshoot in the right panel.
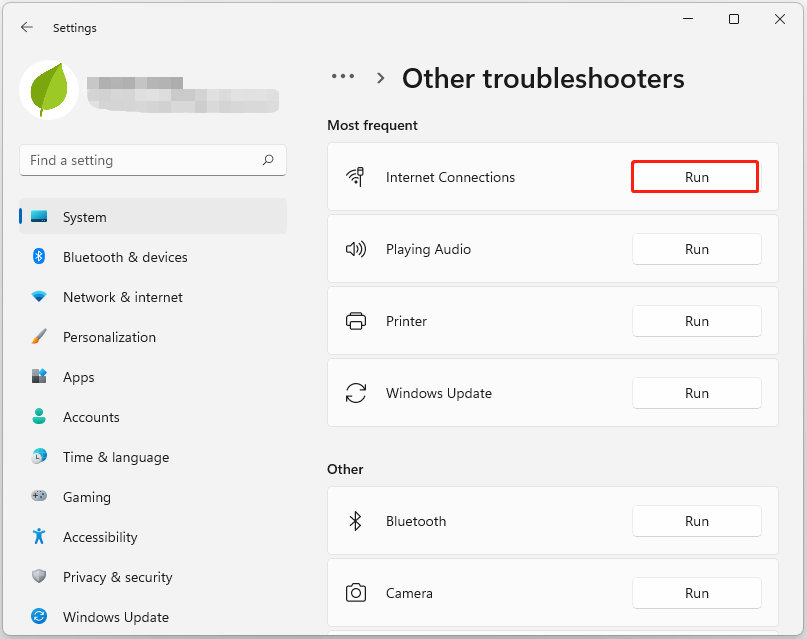
- Then, click Other troubleshooters.
- Click the Run button of Internet Connections.
- Besides, you can also click the Run button of Network Adapter.
- Follow the on-screen instructions to complete the operations.
Method 4. Update or Reinstall Wi-Fi Driver
Sometimes, the outdated or corrupt Wi-Fi driver can trigger the “Windows 11 Wi-Fi not showing up” or “Windows 11 no Wi-Fi option only Ethernet” issue. So, you can try updating or reinstalling the Wi-Fi driver to fix the issue. Here’s how to do that:
Step 1. Press the Win + X keys to open the Quick Link menu, and then select Device Manager.
Step 2. Expand the Network adapters category, and right-click on your wireless adapter:
Update Driver:
- Choose Update driver from the menu.
- Choose Search automatically for drivers.
Reinstall Driver:
- Choose Uninstall device from the context menu.
- Then, go to the motherboard manufacturer’s website.
- Download the latest version of the driver and install it on your PC.
Method 5. Reset Network Settings
If there is no Wi-Fi option in Windows 11, you can also try a network reset to fix the issue. To do that, you can do as follows:
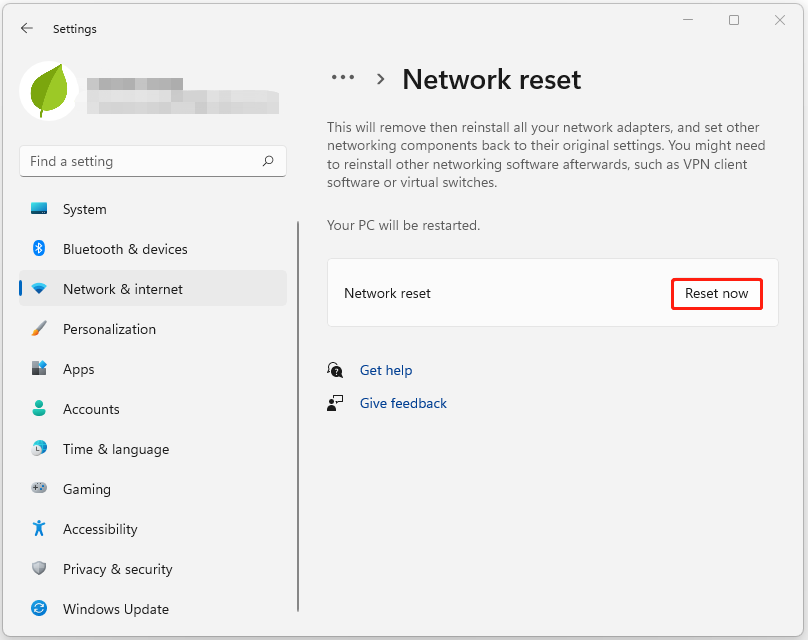
Step 1. Open the Settings window, and go to Network & internet > Advanced network settings.
Step 2. Click Network reset and click the Reset now button.
Step 3. After that, check if Windows 11 no Wi-Fil option is fixed.
Method 6. Check Group Policy
If all the above methods are unable to help you fix the “Windows 11 no Wi-Fi option” issue, you need to check the group policy to see if the setting is incorrect.
Step 1. Press the Win + R keys to open the Run window, type “gpecedit.msc” and press Enter.
Step 2. Navigate to User Configuration > Administrative Templates > Start Menu and Taskbar.
Step 3. Right-click Remove the Network icon from Start Menu and choose Edit.
Step 4. In the Remove the network window, select Disabled.
Step 5. Click OK to confirm changes. After that, reboot your PC and check if the “no Wi-Fi option after Windows 11 update” issue has been resolved.
Bottom Line
How to fix Windows 11 no W-Fi option? There are 6 common fixes for the no Wi-Fi option Windows 11 issue. You can just try them of you face up the same issue on your PC.
About The Author

Position: Columnist
Charlotte is a columnist who loves to help others solve errors in computer use. She is good at data recovery and disk & partition management, which includes copying partitions, formatting partitions, etc. Her articles are simple and easy to understand, so even people who know little about computers can understand. In her spare time, she likes reading books, listening to music, playing badminton, etc.