As a built-in program on your Dell computer, Dell SupportAssist monitors the health of your Dell PC’s software and hardware. If it detects any issues with your Dell computer, it will send a report to Dell. However, if you encounter an error message saying “SupportAssist not working”, it can be quite worrying. But don’t worry, you can find solutions by reading this post from NewsPivot. Read on to learn the details.
Way 1: Rename the New-Dell-Logo-White-Small File
If the SupportAssist has stopped working, you can try to rename the New-Dell-Logo-White-Small file to fix this issue. Here are the steps:
Step 1. Go to File Explorer and open the Program Files folder in Local Disk C.
Step 2. Click the Dell folder and open SupportAssitAgent.
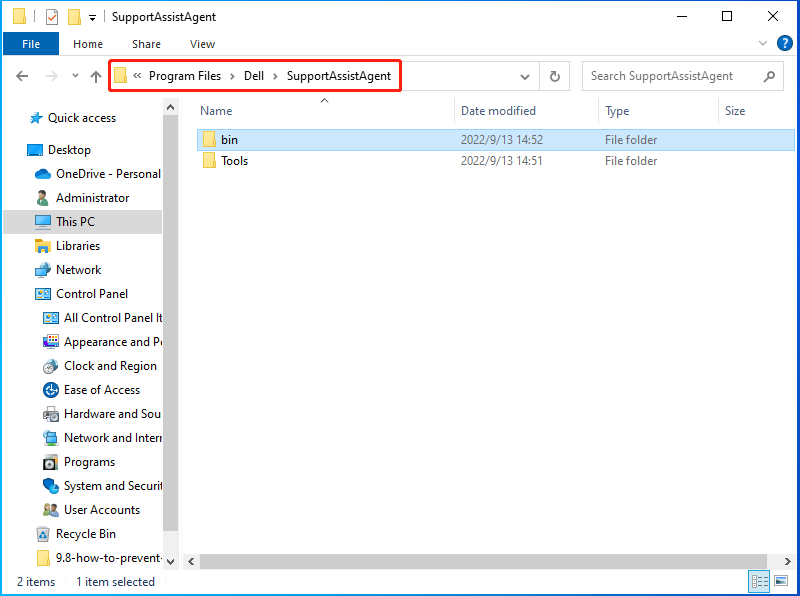
Step 3. Double-click the bin folder to open the Resource folder.
Step 4. Locate the New-Dell-Logo-White-Small file, right-click on it, and choose the Rename option.
Step 5. Type New-Dell-Logo-White and save the name.
Then, you can run SupportAssist again to check if the “Dell SupportAssist not working” issue has been resolved. If not, try another method below.
Also read: What Is Dell Boot Menu & Ways to Enter it on Windows 10
Way 2: Reinstall Dell SupportAssist
Another way you can try to fix the “SupportAssist not working” issue is to uninstall SupportAssist and reinstall it. Follow the steps below:
Step 1. Locate the Apps section under Settings on your device.
Step 2. Find Dell SupportAssist and uninstall it.
Step 3. After the uninstallation is complete, restart the system and reinstall the latest version of Dell SupportAssist.
Way 3: Update to the Latest Windows System
Sometimes, Windows updates can fix many system problems and errors. Therefore, when you encounter the Dell SupportAssistant not working error, you can also try updating your Windows system to the latest version. Here is the tutorial:
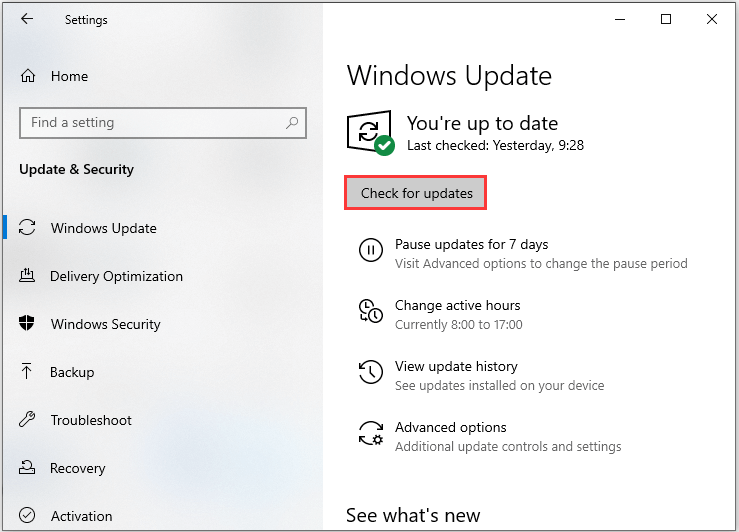
Step 1. Right-click the Start menu on your computer and select Settings.
Step 2. Choose Update & Security on the pop-up Settings window.
Step 3. Under Windows Update, click on Check for updates to check for any new updates. Windows will then search for available updates. If so, simply follow the on-screen instructions to complete the process.
Once the installation is complete, restart your computer and check if the “Dell SupportAssist not working” error is fixed.
Way 4: Check for Virus or Malware
Finally, to fix the “Dell SupportAssist won’t run” issue, you can also use Windows Defender to check for any malware and viruses. Please follow the steps below to perform a full scan.
Step 1. Press Windows + I to open Settings.
Step 2. Navigate to Update & Security > Windows Security > Open Windows Security.
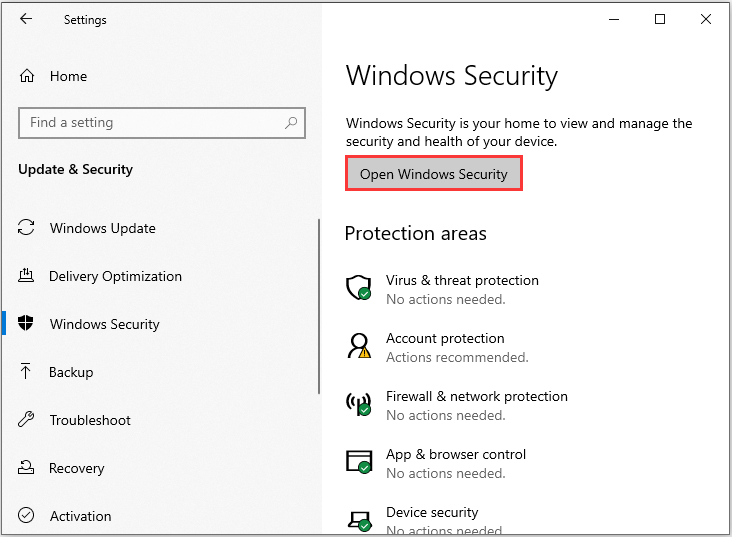
Step 3. Click on Run a new advanced scan in the Windows Security window.
Step 4. Choose Full scan and then click on scan now.
Wait for the process to complete and then you can check whether the “Dell SupportAssist not working” issue is fixed or not.
Conclusion
To conclude, this post introduces 4 possible methods to solve the “Dell SupportAssist not working” issue. You can try one of the ways if you have faced the same problem. Hope this helps!
About The Author

Position: Columnist
Lydia is always interested in new things and has been attracted deeply by writing. Her love for writing makes her become an English editor about multimedia in MiniTool. She’s determined to write articles about photos, audio, video, and other news to offer readers useful suggestions. In her spare time, she enjoys traveling, reading, photography, and having fun with friends.