If you don’t want to create a print task every time by selecting a printer from the options menu, how can you print faster to improve your productivity? In that case, creating a printer shortcut is an effective way. This article from NewsPivot teaches you how to create a printer shortcut.
Why Create a Printer Shortcut
Although the increasing digitization of workloads may have brought the dream of a paperless office closer to reality than ever before, the fact remains that printing paper documents is still something most of us need to do in our daily work.
Common printing scenarios include college students printing graduation thesis, lawyers printing legal documents, or teachers printing test papers, and most of them are batch printing. At this time, the printer shortcut is very useful and can be used to save time and improve efficiency.
How to Create a Printer Shortcut
You may be confused about how to create a printer shortcut on desktop Windows 10. Here are two ways to help you accomplish this goal.
Method 1: Through the Desktop
You can create a printer shortcut through the desktop. It is the simplest way. Here is a tutorial on how to do it.
Step 1: Right-click on the blank area of your desktop, and select New > Shortcut.
Step 2: Input rundll32.exe printui.dll, PrintUIEntry /o /n “printer_name” in the location bar, and press Next.
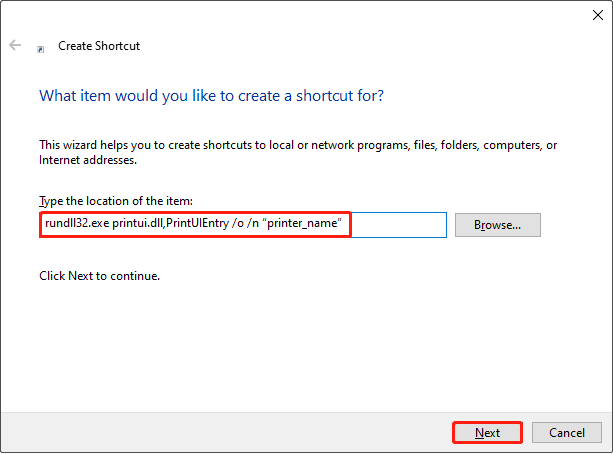
Step 3: Type a name you like for this shortcut, and press Finish.
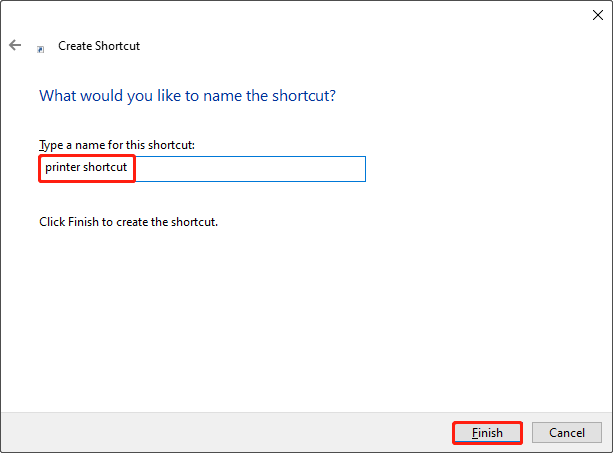
A printer shortcut has been created. You will notice that it is on your desktop.
Related Article: Create Desktop Shortcut Google Chrome to Access Websites Quickly
Method 2: Via the Control Panel
Control Panel is a component of Microsoft Windows that provides the ability to view and change system settings. You can also use it to create a printer shortcut. Here are the steps:
Step 1: Press the Win + S keys, input Control Panel in the search box, and then press Enter.
Step 2: Switch the view to Large icons or Small icons, then click on the Devices and Printers option.
Step 3: Right-click on the printer for which you want to create a shortcut, and then select Create Shortcut.
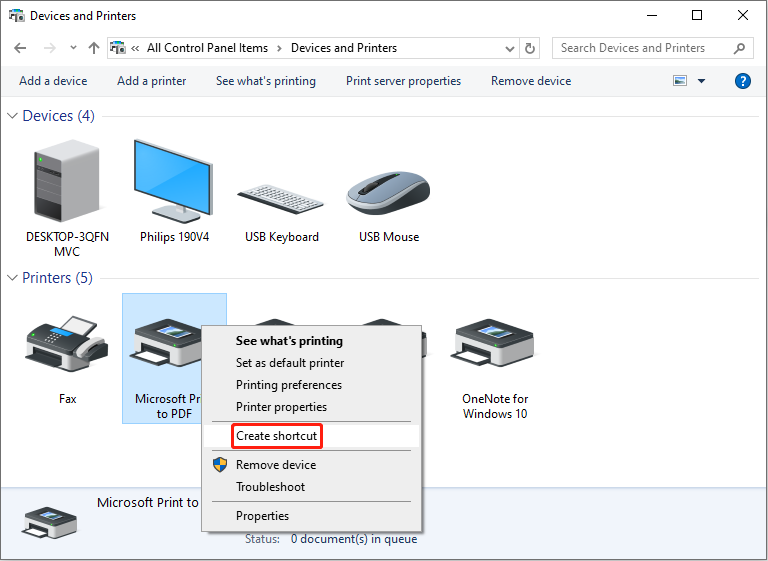
Step 4: There will be a prompt saying “Windows cannot create a shortcut here. Do you want to create it on the desktop?”. When you receive this prompt, select Yes.
After completing these operations, a printer shortcut will appear on your desktop.
How to Fix Printer Shortcut Not Working
The printer shortcut not working may be caused by incorrect properties of the shortcut. In addition, the malware or virus can also interfere with the functioning of your shortcuts. Lastly, the corrupted icon cache can cause the shortcut not to work. Given the above situations, here are some ways to help you fix printer shortcut not working.
Method 1: Check the Shortcut Properties
Right-click on the shortcut that cannot work and select Properties. In the new window, check if the targeted path has extra spaces and characters. If it does, modify it until it is a proper path.
Method 2: Run an Antivirus Scan
The virus can affect the use of the shortcut. In order to eliminate viruses on your computer, you can run an antivirus scan. Antivirus software will scan all your documents and folders and read all the code in them and compare the code to a database of known threats, thus finding and killing viruses.
How to run a virus scan? Here are the steps:
- Right-click on Start and select Settings.
- Select Update & Security > Windows Security.
- Click on Virus & Threat Protection.
- Under Current Threats, click on Scan Options.
- Select Quick Scan and click on Scan Now.
See Also: Can’t Turn on Real-time Protection on Windows Defender
Method 3: Rebuild the Icon Cache
Windows uses the icon cache to display the icons of programs and shortcuts. Sometimes, the cache may be corrupted to cause some problems with the shortcut icon. In this case, rebuilding the icon cache may help, and here is the guide.
Step 1: Right-click on the Start button and select File Explorer.
Step 2: Navigate to this location:
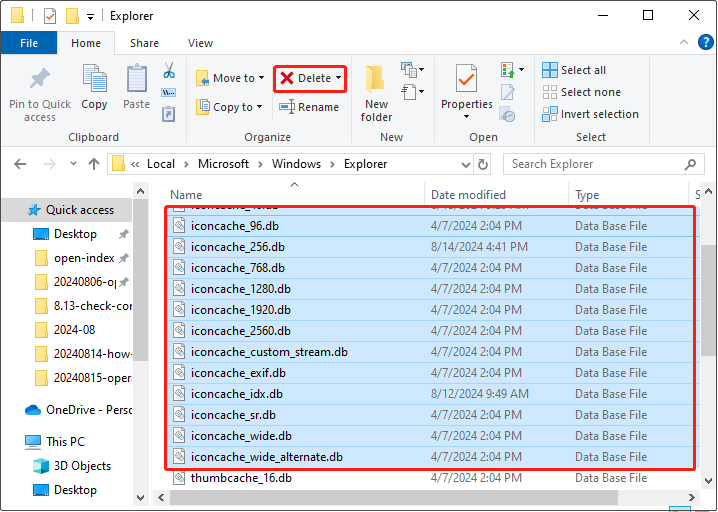
C:\Users\Username\AppData\Local\Microsoft\Windows\Explorer
Step 3: Select all the iconcache.db files, and then click Delete from the Ribbon to delete them.
Step 4: Right-click on the Start button and select Task Manager.
Step 5: In the Processes bar, locate Windows Explorer, right-click on it, and then select End task.
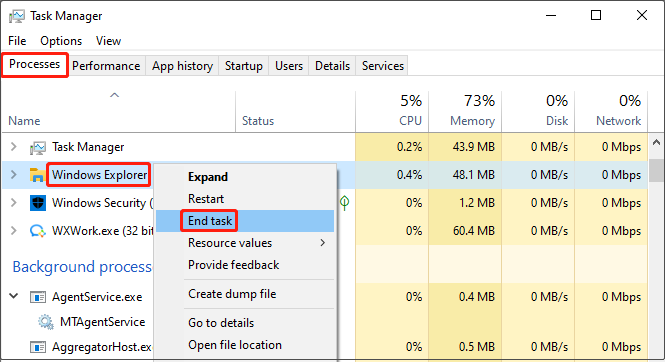
Step 6: Click on File and select Run new task.
Step 7: Input explorer.exe in the open box and press Enter.
Bottom Line
There are some methods to teach you how to create a printer shortcut. When you need to print, you can try that way to save your time and improve work efficiency. If the print shortcut key is not working, you can use one of the methods above to get it back to normal.