What to do if you need to use a VPN on your computer but there is no one? Can you set up VPN on Windows 11 by yourself? This post from NewsPivot puts forward a step-by-step guide to configuring a VPN.
Why Do You Need a VPN?
A Virtual Private Network, shortened as VPN, provides an encrypted way to access data. If your device is equipped with VPNs, you can view content or access websites that are blocked by your region.
Using VPNs to surf the Internet helps protect your data by hiding your actual location and identity from cybercriminals. Both businesses and individuals can benefit from VPNs. You can read the following content to learn how to set up VPN connections on Windows 11.
Learn more: How to Enable and Use Opera VPN on Computer
Set up VPN on Windows 11 via Windows Settings
How to manually configure a VPN on Windows 11? There are generally three steps. You can keep reading and try to add a VPN on your computer by yourself.
Step 1. Add a VPN Account
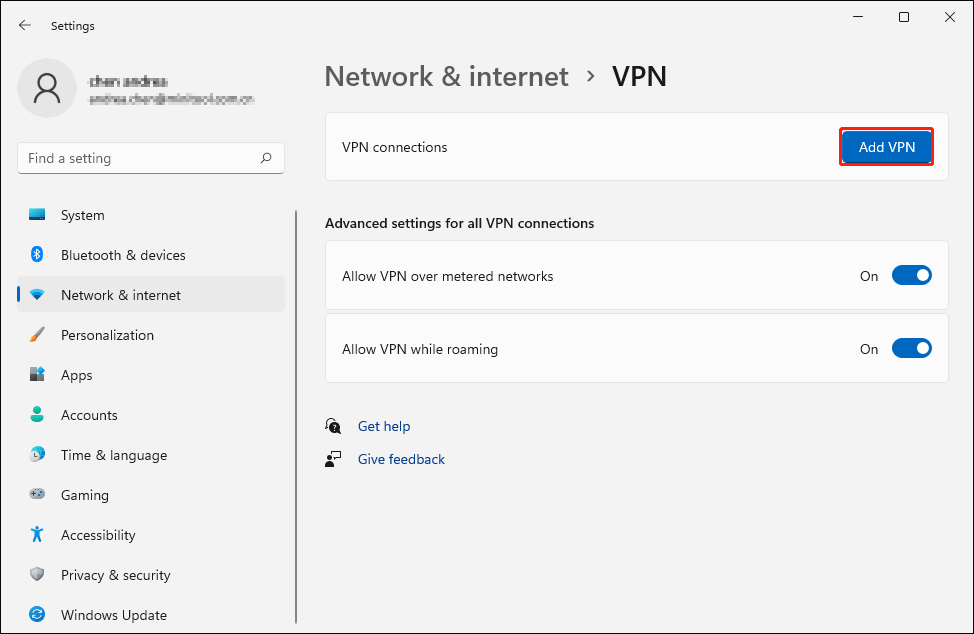
You should first open Windows Settings and navigate to Network & internet > VPN. Click Add VPN in the VPN connections section.
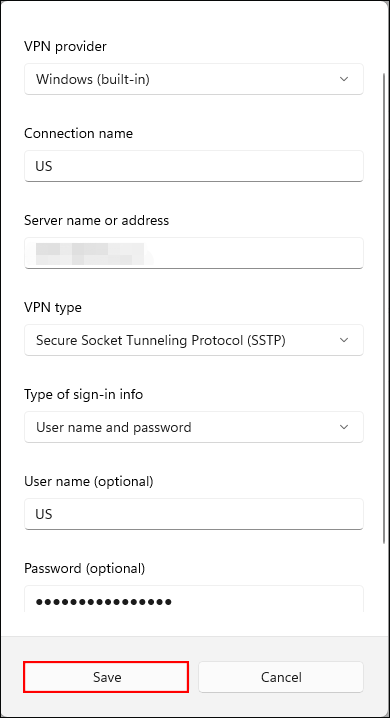
In the prompt window, you should complete the required information. After this, click Save to create a new VPN account.
Step 2. Import the Certificate
After creating a VPN account, you can find it under the VPN connections section. But it can’t be connected at this time. You need to close Windows Settings and start to import the corresponding certificate. Press Win + R to launch the Run window, then type mmc into the text dialog and hit Enter to open Microsoft Management Console.
Navigate to File > Add/Remove Snap-in > Certificates > Add.
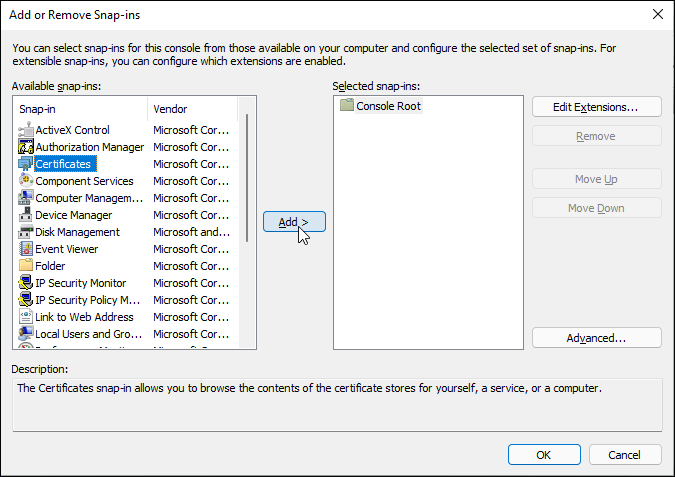
In the prompt small window, choose Computer account and click Next. Keep the default settings and click Finish.
When you return to the Add or Remove Snap-ins window, click OK to save the change.
Afterward, you need to expand the Certificates (Local Computer) option at the left pane of the Console window. Then, shift to Trusted Root Certification Authorities > Certificates.
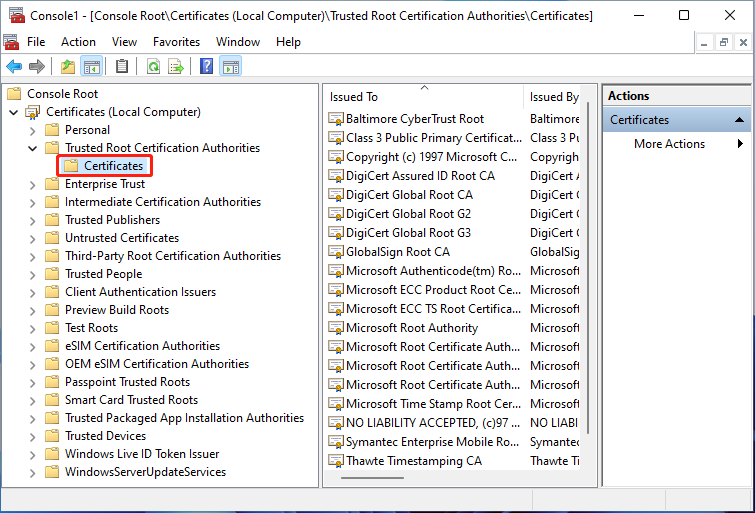
Right-click on the Certificates option to choose All Tasks > Import from the context menu and click Next in the prompt window.
Click Browse in the following window to select the certificate. To find the target file, you need to choose All files (*.*) from the dropdown menu of the file type.
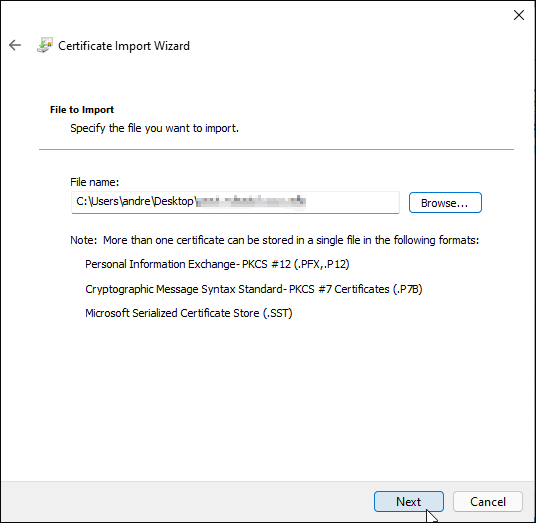
Click Next to set the password of the private key. Keep other settings as default and click Next.
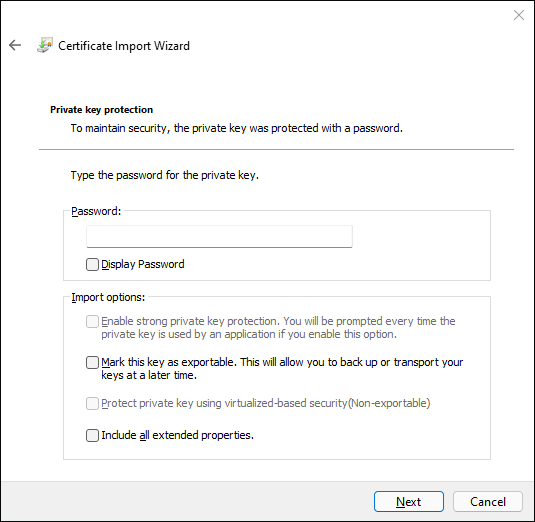
Click Finish and OK to complete the operations
Also see: FortiClient VPN Free Download for Windows, Mac, Android
Step 3. Configure Network Properties
You can close the Console window and open the Control Panel on your computer to start the next step.
Head to Network and Internet > Network and Sharing Center > Change adapter settings. Find and right-click on the added VPN and choose Properties.
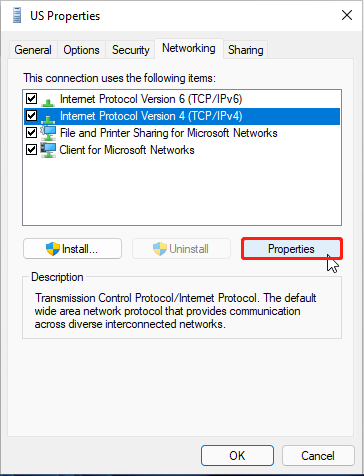
Under the Networking tab, you should select the Internet Protocol Version 4 (TCP/IPv4) option and choose Properties.
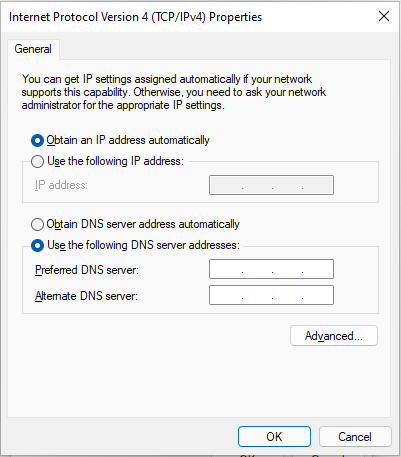
Select Use the following DNS server address and input the correct DNS address. Click OK to save the change. Then click OK to close the window.
How to Connect a VPN on Windows 11
After completing Windows 11 VPN setup, you can now connect the added VPN on your computer. Here are two methods to connect the VPN.
First, you can press Win + I to open Windows Settings and navigate to Network & internet > VPN. Here you can find the added VPN. Click on it and choose Connect to connect and use it.
Alternatively, you can click on the network icon on the system tray and choose the VPN from the list to connect.
Also read: Full Review on VPN for iPhone: Free vs. Premium VPN
Final Words
This is all about how to set up VPN on Windows 11. The setup steps might be complicated, but you can follow our detailed guide to complete the process.