People may add monitors to improve their working efficiency or game experience. However, some users find their Windows 11 not detecting second monitor. If you are also stuck by this issue, this post from NewsPivot gives useful solutions for you.
Gamers or multitaskers usually add monitors to their computers for better computer performance. If you are one of them, you must know the essentials of the external screen. How to resolve the problem when you encounter a second monitor not detected in Windows 11? Here are four feasible tips for you. You can read and try them to see which one works in your situation.
You can first restart your computer to see if the second monitor can be recognized by your computer. Sometimes, computer glitches may lead to this issue, and restarting can fix these temporary glitches easily. If the dual monitor not working on Windows 11 problem still exists after restarting, try the next methods.
Related post: 5 Solutions to Fix Vertical Lines on Monitor – Solved
Method 1. Check Physical Connection
You should ensure the connected port and cable can work properly. A loose connection or damaged cable makes the second monitor unrecognizable. In addition to checking the port and cable, you should also remove all external devices. In some cases, external devices conflict with the normal operation of the machine.
Method 2. Run the Hardware and Devices Troubleshooter
You can run the Windows built-in tool to check if there are any problems encountered between your hardware and any devices. Here is how to run this troubleshooter.
Step 1. Press Win + R to open the Run window.
Step 2. Type cmd and press Shift + Ctrl + Enter to run Command Prompt as administrator.
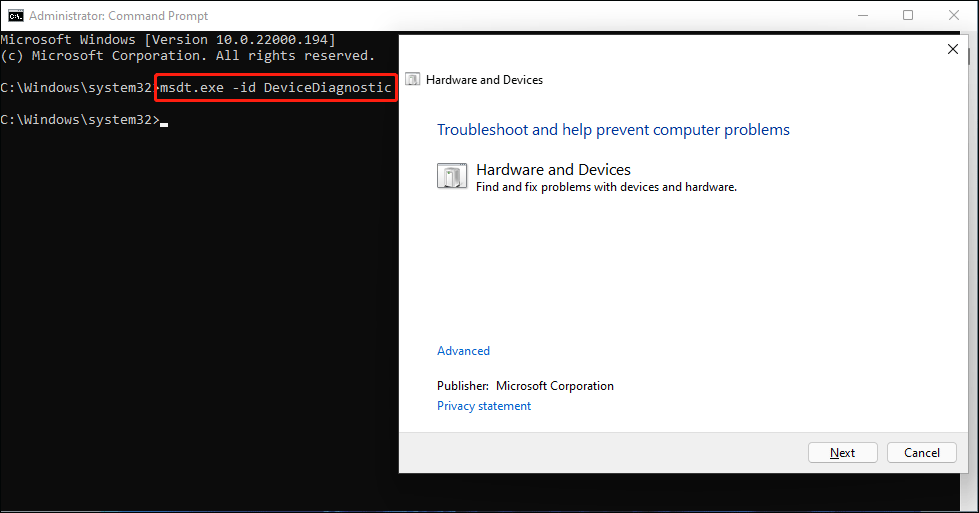
Step 3. Copy and paste msdt.exe -id DeviceDiagnostic in the window and hit Enter to open the Hardware and Device Troubleshooter on your computer.

Step 4. Click Next to detect problems. Your computer will repair the found issues automatically. After this, you can reconnect the monitor to see if the problem is resolved.
Method 3. Adjust the Display Settings
You can manually detect the second monitor via Windows Settings. Follow the next steps.
Step 1. Press Win + I to open Windows Settings.
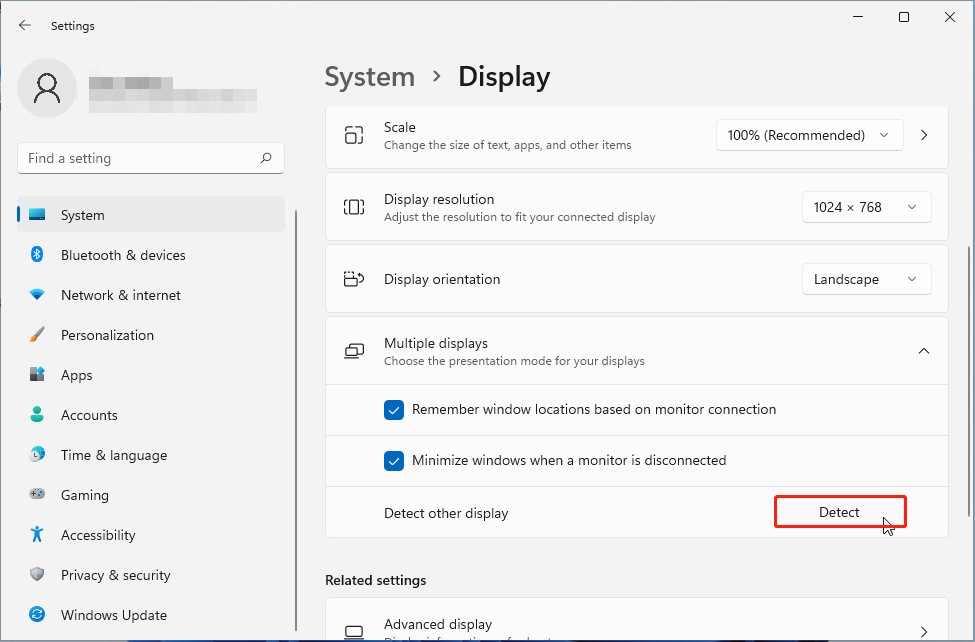
Step 2. Navigate to System > Display > Multiple displays. You can expand the Multiple displays option and click Detect to manually find your connected screen.

Method 4. Update/Reinstall Graphics Driver
The external monitor connects your operating system via the graphics driver. Therefore, the corrupted or outdated driver may be responsible for the Windows 11 not detecting second monitor issue. If your problem is caused by this reason, you can work with the following instructions.
Step 1. Right-click on the Windows icon and choose Device Manager to open it.
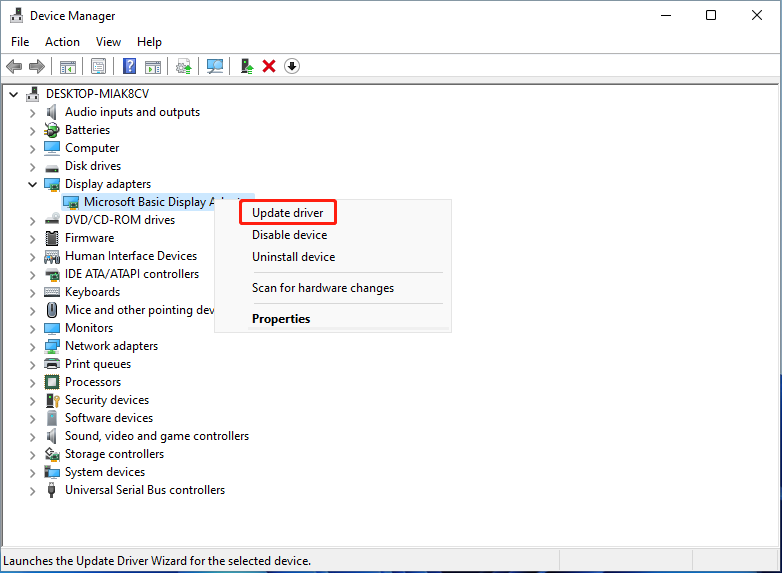
Step 2. Find and expand the Display adapters. Then, right-click on your graphics drive to choose Update driver from the context menu.

Step 3. Choose Search automatically for drivers from the prompt window.
Wait for your computer to find and install the latest compatible driver on your computer and try to reconnect your monitor. If the computer still can’t detect your monitor, try to reinstall the display adapter by choosing Uninstall device from the same context menu and clicking Uninstall again to confirm.
Final Words
Setting up dual monitors in Windows 11 significantly improves the experience for users seeking a high-performance computer. If you are stuck in Windows 11 not detecting second monitor, read and try the four methods to fix it by yourself.