Sometimes, even if your Android phone is connected to WiFi, it still can’t use the Internet. The system merely alerts you to the problem but does not provide a solution. There are many reasons for this problem. If the “Android connected to WiFi but no Internet” error occurs on your phone, you can try these methods in the post from NewsPivot.
Method 1: Restart Phone and Router
If you want to resolve the “WiFi is connected but no Internet access” error, you can try restarting your device and router to troubleshoot the problem.
You can restart your phone by holding down the power button and selecting the Restart option. Turning off the router requires finding the power plug of the router, then unplugging the power cord, and waiting for the router to turn off completely. Then wait about 30 seconds, plug the power cord back in, and the router will start automatically.
Related post: Samsung Internet Keeps Opening Automatically? Here Are Fixes!
Method 2: Turn off Mobile Data
Sometimes, Android isn’t as sensitive as we think it is. When you connect to a WiFi network, Android prioritizes WiFi over mobile data. However, some networks require users to log in before accessing the Internet. Even after logging in, Android may not treat it as an active connection and still use mobile data. In this case, Android may not be able to connect to the Internet on both networks at the same time, resulting in the “Android connected to WiFi but no Internet” error.
To avoid such a problem, you simply need to turn off your mobile data when you successfully connect to a WiFi network. You can drag down from the notification panel at the top of the screen to access the drop-down menu, then click the Mobile data icon to turn it off.
Related post: You Can Enable and Disable Developer Mode on Android if Needed
Method 3: Forget and Reconnect to the WiFi Network
Another way to fix the “Android connected to WiFi but no Internet” error is to simply forget WiFi and reconnect. When you select “Forget this network”, the device will clear all the old configuration information related to the network, including IP address, DNS Settings, and so on. This helps resolve network connectivity issues due to old configurations. Follow these steps:
Step 1: Drag down the drop-down menu from the notification panel at the top.
Step 2: Press and hold the WiFi icon to open the list of WiFi networks. Here you can see all the WiFi you can and have connected.
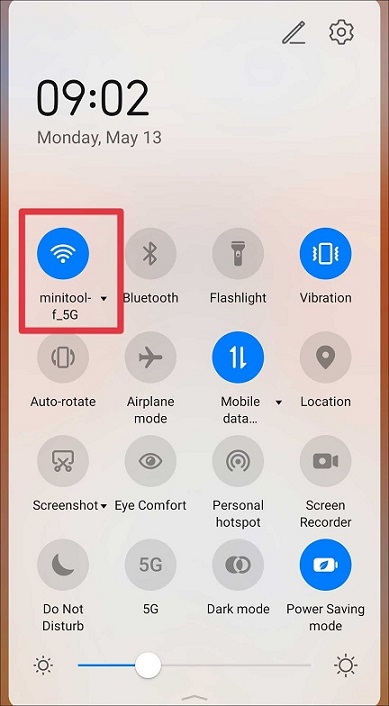
Step 3: Now click on the name of the WiFi you want to connect to.
Step 4: Click the FORGET option.
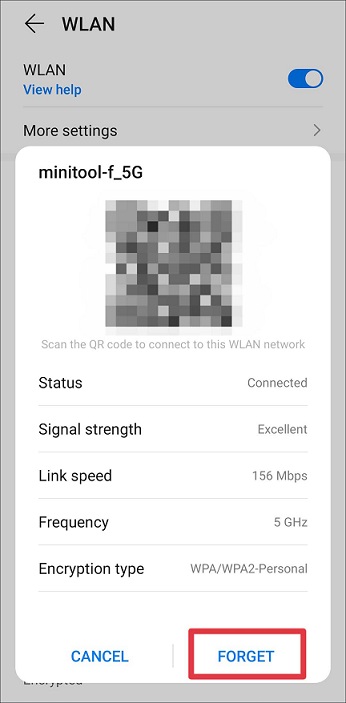
Step 5: After that, tap the same Wifi again and enter the password to reconnect.
Related post: How to Connect Wi-Fi Without Password on Android
Method 4: Check the Android’s Network Permission
Checking your device’s network permissions is an important step in solving the “Android connected to WiFi but no Internet” error. You can follow these steps:
Step 1: Open your phone’s Settings.
Step 2: Swipe and find the Apps option and tap to enter.
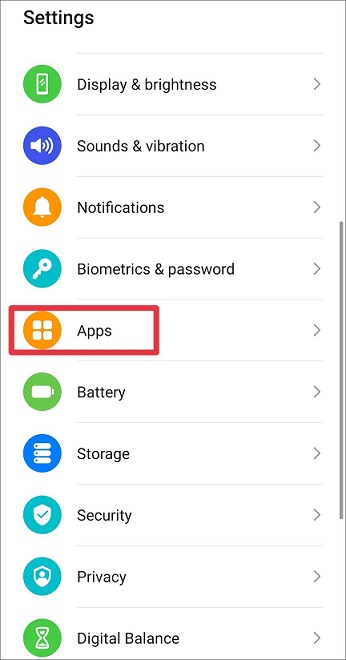
Step 3: In the application list, find the application that you want to solve the network problem, and click to go to the application information page.
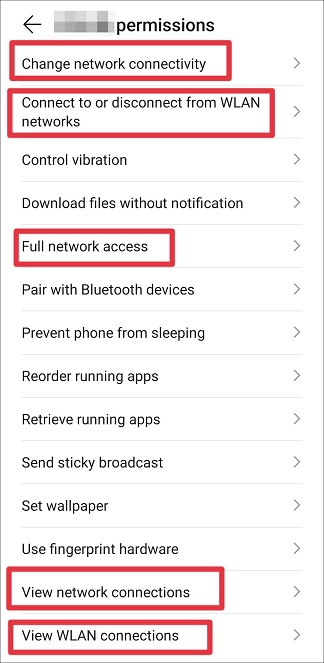
Step 4: Find the Permissions option and click it.
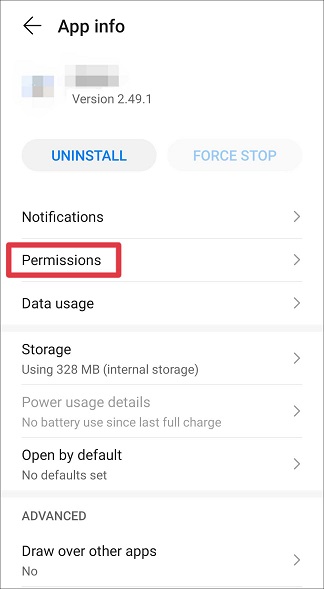
Step 5: In the permission list, find the permissions associated with the network or WiFi and make sure that these permissions are enabled. If the permission is disabled, you need to click on it to enable it directly.
Method 5: Reset Android Network Settings
If Android is on WiFi but the Internet connection is missing, you can try to reset the network settings on your Android device. This is a useful solution to clear all saved network settings and rematch your device’s WiFi. You can follow these actions:
Step 1: Go to Settings on your phone.
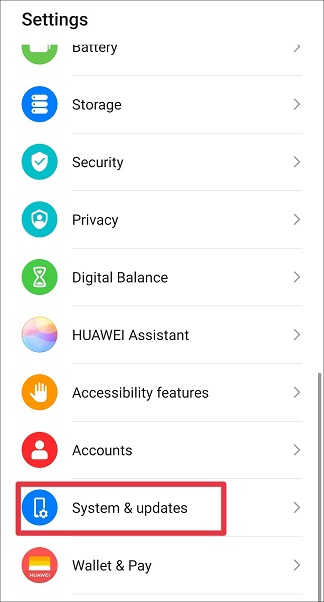
Step 2: Now click on System & updates.
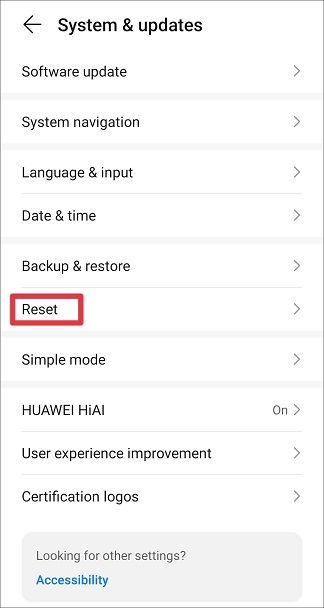
Step 3: Tap on the Reset button.
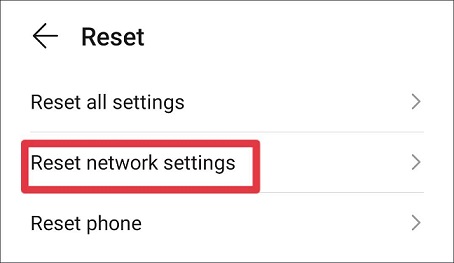
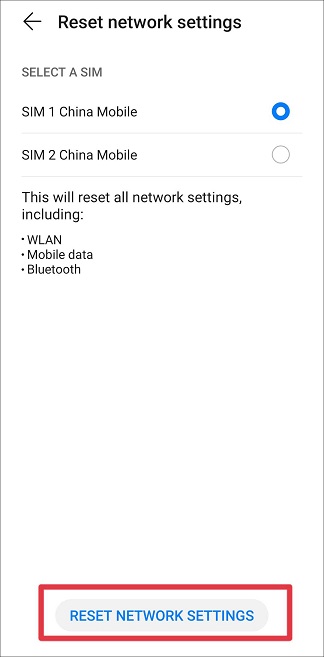
Step 4: Now select the Reset network settings option.
Step 5: Click the RESET NETWORK SETTINGS button at the bottom of the screen.
Step 5: Now try connecting to WiFi again and see if you can fix the “Android connected to WiFi but no Internet” error.
Related post: 5 Solutions for the Mobile Network State Disconnected Error
Final Words
Now you can follow the above solutions to try one by one. Hopefully, the article will help you solve the “Android connected to WiFi but no Internet” error. If the problem persists, you may need professional technical support or consider device hardware issues.