Although Windows 11 can download and install drivers for hardware automatically, sometimes, you don’t want your system to do that. If drivers are installed incorrectly, it can lead to problems such as frequent errors and crashes, or even damage to the hardware. Thus, some users want to disable automatic driver updates in Windows 11. This post from NewsPivot introduces how to disable automatic driver updates in Windows 11.
Related posts: No Signed Device Drivers Were Found: How to Fix
Way 1: Via Settings
To prevent drivers from installing automatically, you can use Settings to change it.
1. Press the Windows + I keys together to open Settings.
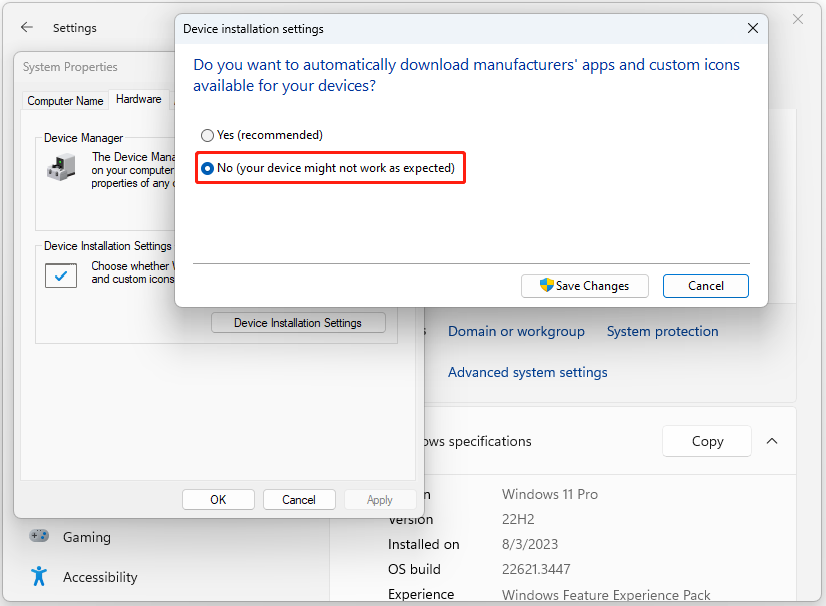
2. Go to System > About. Click the Advanced system settings link.
3. Go to the Hardware tab and click the Device Installation Settings option. Then, choose No (your device might not work as expected) and click Save Changes.

Way 2: Via Control Panel
The second method for you to stop Windows 11 from downloading Drivers is via Control Panel.
1. Type Control Panel in the Search box to open it. Choose Devices and Printers.
2. Then, repeat the steps 2-3 in method 1.
Read this post: Step-by-Step Guide on How to Disable Windows Hello
Way 3: Via Registry Editor
If you use Windows 11 Home, you won’t have access to the Local Group Policy Editor. You can disable automatic driver updates in Windows 11 via Registry Editor.
1. Press the Windows + R keys together to open the Run dialogue box.
2. Type regedit in it and click OK to open Registry Editor.
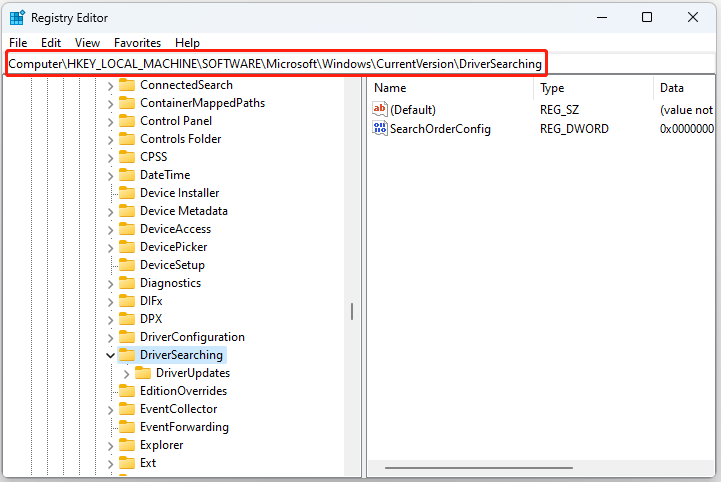
3. Go to the following path:
HKEY_LOCAL_MACHINE\SOFTWARE\Microsoft\Windows\CurrentVersion\DriverSearching

4. Double-click the SearchOrderConfig DWORD key, and change its value from 1 to 0.
Way 4: Via Local Group Policy
If you are Windows 11 Pro users, you can also use the Local Group Policy Editor to prevent drivers from installing automatically.
1. Press the Windows + R keys together to open the Run dialogue box.
2. Type gpedit.msc in it and click OK to open Local Group Policy.
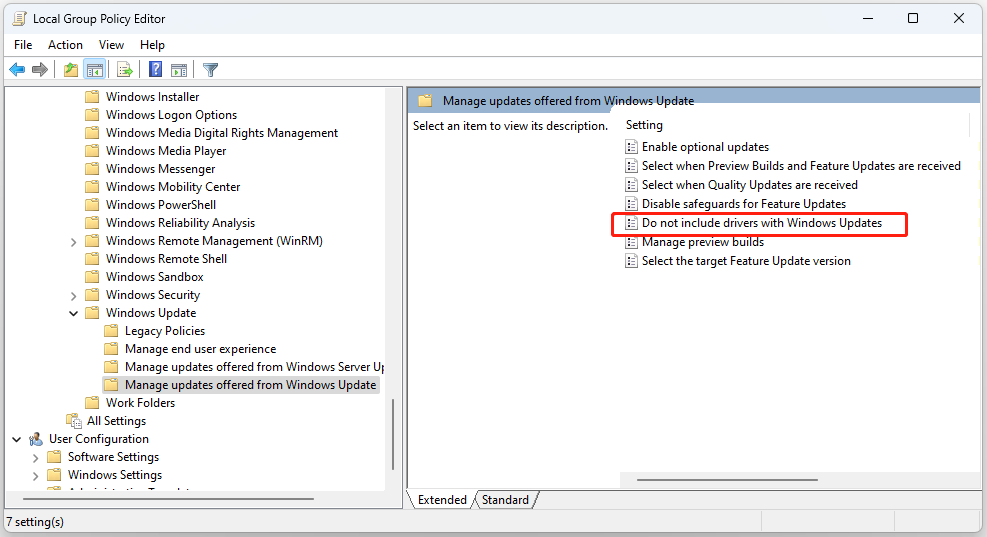
3. Go to the following path:
Computer Configuration > Administrative Templates > Windows Components > Windows Update > Manage updates offered from Windows Update
4. Double-click the Do not include drivers with Windows Updates option.

5. Check the Enabled option and click the Apply button. Then, click the OK button.
Also read: How to Download/Update Acer Drivers in Windows 11/10
Final Words
How to disable automatic driver updates in Windows 11? This post provides 4 ways for you to do that and you can choose one of them based on your needs. I hope that this post will be useful to you.